Cuidados del shinaiShinai Care
El shinai es la pieza de nuestro equipo personal que más deterioro sufre con cada entrenamiento. Debido a este desgaste es frecuente que aparezcan astillas en las varillas, o incluso que se rompan una o varias de éstas.

Herramientas
Una preparación previa del shinai y unos cuidados periódicos mínimos permitirán prolongar la vida útil de éste, con lo que aumentaremos el grado de seguridad de nuestros compañeros y además ahorraremos.
Estos cuidados son los siguientes:
Con un shinai nuevo:
Hay que preparar el shinai para que pueda ser utilizado en los entrenamientos, para ello tendremos que:
- Retirar los hilos que mantienen juntas las varillas del shinai (por lo general hilos dorados/rojos/azules)
- Desmontar el shinai.
- Presionar con una cucharilla de café o similar los cantos de cada una de las varillas

Con cantos afilados

presionar los cantos

Con cantos romos
- Lijar los cantos para darles una forma redondeada, pues impactar con una de estas aristas contra piezas duras (como puede ser la rejilla del Men) hace que aparezcan astillas y roturas.

Lijar los cantos
- Aceitar las varillas. Una varilla seca es menos flexible y absorbe menos daño que una bien aceitada. Además, con el aceite daremos el suficiente peso al shinai como para que pase los controles de peso en las competiciones. Para aceitar las varillas suelo usar una botella de aceite de girasol barato, pero otros tipos de aceite, algunos de ellos específicos para este uso, son válidos también. Podemos hacerlo, por inmersión (si hemos fabricado algún recipiente para ello) o bien empapando toda la cara interna de las varillas, dejándolo absorber y repitiendo este proceso durante unos días. Para finalizar eliminamos el sobrante con un papel absorbente.
- Montamos el shinai
Durante el entrenamiento:
Un buen kendoka revisa siempre el shinai antes, durante y después de cada entrenamiento. De esta manera el kenshin demuestra respeto y consideración hacia sus compañeros y su seguridad.
Durante el entrenamiento es importante no interrumpir la clase y en ningún caso hacerlo mientras hay una explicación. Debe ser una revisión visual, rápida y mecánica del estado general (en especial las varillas y la sakigawa). Gracias a ello podremos ver si a salido alguna astilla en las varillas, o incluso, si se ha roto alguna. En estos casos, por motivos de seguridad, será necesario cambiar de shinai antes de continuar con el siguiente ejercicio. ¿Qué buscar?
Cada 2-3 entrenamientos o cuando se encuentre un problema en el shinai durante el entrenamiento:
Tendremos que desmontar el shinai para revisar que el interior de las varillas no tiene ninguna rotura o astilla que nos haya pasado desapercibida en la inspección superficial y para volver a apretar el tsuru y el nakayui que suelen aflojarse. Para ello:
- Desmontar el shinai.
- Revisar una a una las varillas buscando cualquier rotura o astilla. Hay que tener en cuenta que es posible que un take, que a simple vista parece que está en buen estado, por dentro tenga una rotura considerable. ¿Qué buscar?
- Para retirar las astillas se utiliza la parte de atrás (¡nunca el filo!) de un cutter o de unas tijeras hasta que desaparezca. Posteriormente, con papel de lija lijar hasta eliminar la marca de la astilla.
- Descartar las varillas rotas
- Comprobar que las distintas piezas de cuero del shinai (principalmente el kensen y el naka-yui que son las que más se desgastan) se encuentran buen estado y que no tienen agujeros ni roturas, haremos lo mismo con el tsuru. En caso de encontrarnos alguna pieza en mal estado la cambiaremos por la de un shinai viejo.
- Volvemos a montar el shinai.
¿Qué buscar?
Veamos cuáles son los desperfectos que debemos buscar:
En las varillas:
Las varillas son, con seguridad, el elemento que más se deteriora de un shinai, y puede ser peligroso. Podemos distinguir tres casos:
- Rotura en una varilla: Si durante la práctica detectamos este problema, debemos cambiar el shinai inmediatamente. Una varilla rota no se puede reparar así que habrá que reemplazarla por otra.
- Astilla: Si durante la práctica detectamos este problema, también debemos cambiar el shinai inmediatamente. La diferencia con una varilla rota es que normalmente la varilla sí se puede reparar con el cutter, dejando la superficie lisa otra vez.
- Aparición de hilos de fibra: La abrasión que sufre el shinai durante la práctica suele levantar hilos de fibra. Aunque es conveniente cambiar de shinai si se detectan, no es crítico ni peligroso y será sencillo de eliminar con el cutter o la lija.

rotura

Astilla reparable

fibras
En el tsuru:
En el caso del tsuru la revisión visual no es suficiente. Debemos tocar el tsuru como si de una guitarra se tratase. De esta manera no sólo comprobamos al tacto su tensión, si no que además el sonido también nos dirá si está correctamente tensado. Si el sonido es agudo todo es correcto, pero si no hace ruido o si suena grave debemos tensarlo.
Otra manera es tirar de la sakigawa hacia fuera y comprobar si cede. Si lo hace habrá que tensarlo.
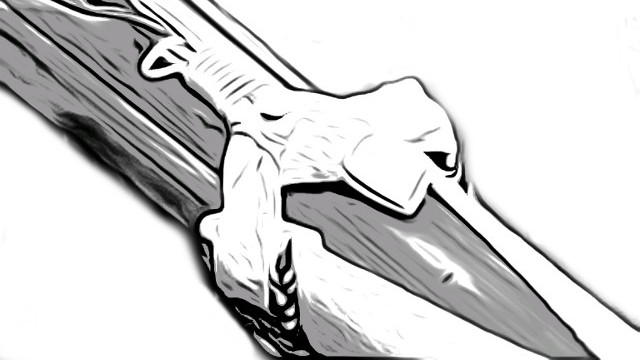
En la sakigawa:

sakigawa rota
Una rotura en la punta de la sakigawa puede permitir que uno de los takes salga fuera a través del agujero. Este desperfecto es aún más peligroso que un take roto y por tanto debemos poner especial atención revisándolo. Al menor indício de rotura debemos cambiar la sakigawa y nunca intentar repararla.
En la tsukagawa:

tsukagawa rota
Si bien no presenta un peligro por sí misma, la rotura de la tsukagawa suele provocar una pérdida de la tensión del tsuru que sí es peligroso.
The shinai is the part of our equipment that suffers more impairment with each workout. Due this often appear splinters on the slats, or even can break.
Tools
Prior preparation of the shinai and a minimum periodic care will extend the life of it, which will increase the level of safety of our mates and we also save money.
These cares are:
With a new shinai:
We must prepare the shinai so it can be used in a training. To do this we must:
- Removing the threads that held together shinai slats (usually are gold / red / blue threads).
- Disassemble the shinai.
- Press the edges of each of the slats with a teaspoon or something similar.
Sharp edges
Press edges
Blunt Edges
- Sand the shinai´s edges to give them a rounded shape, so the edges can slide each other, preventing splinters or cracks are created.
Sand edges
- Oil the slats: A dry slat is less flexible and absorbs less damage than a well oiled one. Also with oil we give sufficient weight to pass weight controls in competitions. To oil the slats usually use a bottle of cheap sunflower seed oil, but other types of oil, some of which are specific for this use are also valid. There are several ways to do this, by immersion (if we made a container for it) or empapand the inside of the strips, leaving them absorb the oil and repeating this process for a few days. Then remove the excess with a paper towel.
- Reassemble the shinai
During the training:
A good kendoka always checks the shinai before, during and after each workout. Thus the kenshin shows respect and consideration for their classmates and their safety.
During training it is important not to disrupt the class and in no case do it while there is an explanation. Must be a quick visual check of the general condition (especially the rods and sakigawa). As a result we can see if there is any splinter in the slats, or even if you have broken one of them. In these cases, for security reasons, you must change your shinai before continuing with the next exercise. What do you look for?
Every 2or 3 Workout session or when it is a problem in the shinai during the workout:
We will have to remove the shinai to check the inside of the slats has no break or splinter non visible at the external inspection and to tighten the nakayui and tsuru, that get loose often. To do this:
- Disassemble the shinai.
- Revise one by one the slats looking for any breakage or splinter. There that bear in mind that is possible that a take, that at first glance seems that is in good condition, keep considerable breakage by inside. What do you look for?
- To remove splinters is used the back (not the edge) of a cutter or scissors until it disappears. Then, with sandpaper to sand the surface.
- Discard broken slats.
- Check that the leather parts of shinai (mainly kensen and naka-yui that are most wear) are in a good condition and have no holes or breakages, do the same with the tsuru. In case of find a broken element, replace it from an old shinai.
- Reassemble the shinai.
What do you look for?
Let’s see what defect it should look:
At slats
The rods are surely the element that more deteriorate from a shinai, and can be dangerous. We can distinguish three cases:
- Slat breakage: If during practice we detect this problem, we must change the shinai immediately. A broken slat can not be repaired so we have to change it by other.
- Splinter: If during practice we detect this problem, we must also change the shinai immediately. The difference with a broken slat is that usually in this case the slat can be repaired with the cutter, leaving the surface smooth again.
- Appearance of fiber strands:The abrasion suffered during practice shinai usually make appear fiber strands. Although it is convenient to change shinai if are detected, is not critical or dangerous and is easy to remove them with sandpaper or cutter.
Breakage
Repairable splinters
fiber strands
At tsuru:
In the case of the tsuru a visual review is not enough. We must play the tsuru as if it were a guitar string. In this way not only check the tension with the touch, the sound will tell us too, if is properly tensioned. If the sound is high pitched everything is correct, but if it is low pitched or have no sound, then we must tighten it.
Another way is to pull the sakigawa out and see if it moves. If it moves we have to tighten it.
At sakigawa:
broken sakigawa
A break in the tip of the sakigawa can allow one Takes slip out across the hole. This damage is even more dangerous than a broken take and therefore we must pay special attention to reviewing it. At the first sign of breakage we must change the sakigawa and never try to repair it.
At tsukagawa:
broken tsukagawa
While is not a hazard itself, breaking the tsukagawa usually cause a loss of tension on tsuru which it is dangerous.


Excelente artículo
Muchas gracias por describir el proceso tan al detalle…. me ha servido de gran ayuda y he conseguido poner a punto mi shinai a la perfección.
Muchas gracias, Javier, por esta explicación TAN CURRADA. Ahora veremos si somos capaces de segir tus indicaciones igual de bien porque no es “moco de pavo” esto como para hacerlo 1 vez al mes…jejeje…¡Mon Dieu!